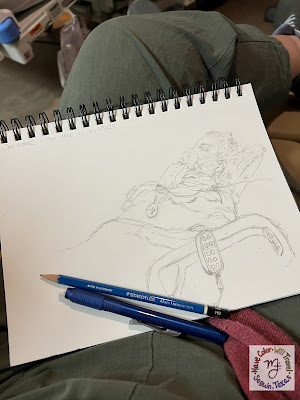
My Two Favorite Bic Marking/Sharpie Marker Art Techniques (because coloring with permanent marker is awesome!)
*Any links to supplies found on Amazon are affiliate links. Should you decide to bring home an art tool I’m talking about and purchase it through the links found here, a few pennies of that purchase are distributed to me. It isn’t much, but it (slowly) adds up—it’s a lovely way to support the content that I create, and it comes at no cost to you, which is awesome, too. Thanks, in advance, to anyone who supports my art in this way; I really appreciate it!
And, was I wrong.
Many coloring enthusiasts have since colored my coloring book, bookmarks and cards to absolute gorgeousness, and not with expensive, artist quality alcohol-based Copic Markers either, but with run of the mill Sharpie and Bic Marking permanent markers (which also happen to be alcohol-based)!
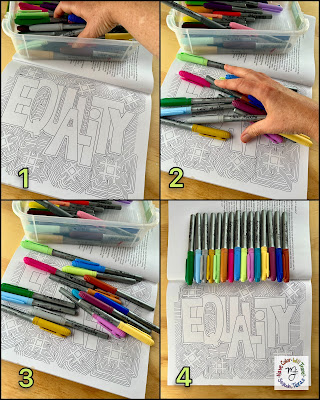
Skip forward to the fall of 2019, and my go-to coloring supplies of choice whether for coloring during travel, creating colored examples of my coloring adventures for the HCWT Coloring Shop, or simply coloring for pleasure are more often than not my permanent markers (I favor Bic Marking permanent markers over Sharpies as they have almost no odor to speak of, but I also have a fine collection of Sharpies as the two companies have very different color selections)!
Here are my two favorite coloring-with-permanent-marker techniques: rubbing alcohol with permanent markers, and layering colors of differing values to create ombres and color blends. What I love about these two tricks (besides the fact that they make for super satisfying and therapeutic coloring experiences) is that they are both inexpensive, which means you can experiment with your markers without worrying about how much money your coloring trial-and-error exploration costs you.
Using Rubbing Alcohol With Permanent Markers
Do you have Isopropyl alcohol? Do you have some plastic lids and bottle tops waiting to be recycled? Do you have a small paintbrush? Well, then you have the supplies to stop coloring with your permanent markers and start painting with them!
") |
| A bottle of alcohol ($.99), some plastic you have lying around and a synthetic bristle paintbrush (I like using my travel water brush as the bristles are firm like a paint pen which helps it to pick up pigment quickly) is all you need to start painting with your permanent markers! |
Using the coloring technique of diluting permanent marker ink with alcohol has revealed to me all of the different colors that go into creating the strongly pigmented shades that come directly out when we color with these sorts of markers traditionally (there is a whole lot of blue in dark brown and waaay more than fifty shades of grey in black). Also, don't throw away your used plastic lid paint palettes! If you still have ink on those babies, all you have to do to paint with it again is sprinkle some alcohol on the pigment to reignite the color! I have a whole area in my studio devoted to "used paint palettes," and I use them for coloring on the wild side (no markers, no pencils, just picking up pigment from old palettes and seeing what happens - waste not, want not, right?).
Creating Color Blends With Permanent Markers
Creating color blends with permanent marker is really as simple as 1,2,3 (and 4, 5)!
1. Choose your color palette (selecting colors that sit close to each other on the color wheel makes for the most seamless color blends, but I hope you will feel brave enough to give this technique a try on any 2 or 3 colors and see see what happens) and pop open the caps of ALL of your markers (there is no time for opening and closing marker caps with this process).
2. Lay down a saturated layer of your lightest color.
3. Color your second darkest color over the section of the lightest color where you would like the two colors to start blending.
4. Re-color your lightest color over both of the areas you just colored (the lighter color and the slightly darker shade) going back and forth over the seam where the two colors meet with the lightest shade of marker.
5. If you are using three or more colors, add your next darkest shade where you would like it to go, and then quickly repeat steps 2 - 4, making sure to color with the proper shade of marker in the desired space (having your hands full of markers without caps on them can lead to colors flying every which way).
One of the reasons loads of folks enjoy coloring with permanent markers is that "finishing" a page happens much more quickly than it typically does with colored pencils or crayons. And, there is nothing wrong with the satisfaction of getting to the end of your creative time and feeling like you've completed something! But, one of my favorite things to do with both of these permanent marker techniques is to add layers of colored pencil on top of the color bleeds and blends I've made, after my coloring page is thoroughly dry, of course. I have achieve fabulous shading and depth in my coloring by using markers and colored pencils together, and I highly recommend giving this "kitchen sink" approach to coloring a try!
Whether these permanent marker tricks are your final stop in coloring or they are another tool to add to what I hope is your ever-growing coloring toolbox, I do hope you find these permanent marker techniques as fun to use in your creative time as I have in mine!

I really like the effects created by these techniques, especially the watercolor style you get from using the alcohol, but you nailed my hesitations right on the head in your conclusion-- I usually color with markers because I can lay down pigment quickly and easily and complete a page faster. These techniques slow down the process a lot so i'm not sure they'd be as enjoyable for me. However, I do love the idea of coloring in marker and then going over it with the colored pencils, so that it increases in quality all over. Just some of my thoughts as a Preferred Marker Colorer!
ReplyDeleteI love hearing other's perspectives on the creative process! It is fascinating to see creation through another's eyes. For me, "painting" with permanent markers is incredibly soothing, almost meditative. I definitely consider the outcome of how it looks LESS than when I color with markers in their traditional way. Don't know why...it could simply be the difference between a brush versus a pen tip changes my emotional focus somehow?
Delete